Basement walls are often the unsung heroes of our homes, silently bearing the weight of the structure above while remaining largely out of sight—until, of course, they crack. Each fracture tells a story, one that reflects the dynamic relationship between moisture, temperature shifts, and the soil surrounding your foundation.
For homeowners, deciphering these cracks can feel daunting, leading many to wonder whether to call a professional or take matters into their own hands. Fortunately, with the right tools, a bit of knowledge, and a sense of determination, repairing those pesky cracks can turn into a satisfying DIY project.
In this guide, we will navigate through the steps required to identify, assess, and remedy basement wall cracks, empowering you to restore the integrity of your home and gain confidence in your repair skills. So, roll up your sleeves, and let’s dive into the world of basement repair!
Step-by-Step Guide to Repairing Basement Wall Cracks

To tackle the challenge of repairing basement wall cracks, begin by assessing the extent of the damage—this is crucial. Are they hairline fractures or gaping fissures? Grab a bright flashlight to illuminate the affected area, then clean out any debris, dust, and loose materials from the cracks.
Next, if the gaps are wider than a quarter-inch, consider using a chisel and hammer to widen them slightly; this allows for better bonding of your repair material. Fill the cracks with high-quality hydraulic cement, ensuring to press it firmly into place for a watertight seal. If moisture is a concern, applying a waterproofing sealant can provide an extra layer of protection.
Finally, allow the repair to cure as directed, and don’t forget to inspect regularly! Each step, though simple, plays a pivotal role in fortifying your basement against the relentless forces of nature.
Preparing the Crack

Before diving into the repair process, preparing the crack itself is fundamental for achieving a durable solution. Begin by clearing any loose debris or crumbling concrete from the edges of the crack using a wire brush or chisel; this ensures that your repair material adheres properly.
Next, use a vacuum to remove any dust or small particles — a clean surface is crucial in sealing the crack effectively. If the crack is particularly wide or deep, consider using a masonry bit to widen it slightly and create a consistent groove.
This might seem counterintuitive, but widening actually helps the repair compound bond more effectively. Lastly, dampen the area with water to prevent the dry concrete from drawing moisture away from your repair material, allowing for a more seamless and effective seal.
With the crack fully prepped, you’ll be well on your way to restoring the integrity of your basement wall.
Filling the Crack

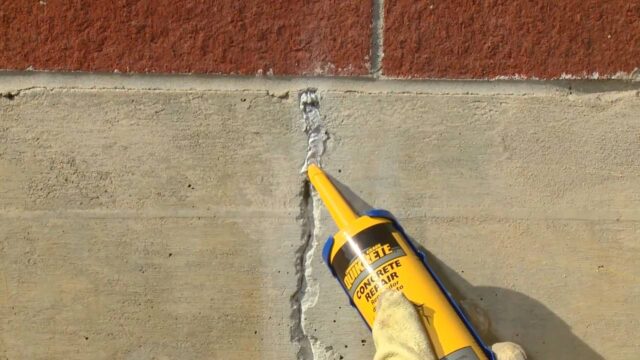
Filling the crack is a vital step in ensuring your basement remains dry and structurally sound. Begin by thoroughly cleaning the area around the crack; remove any loose debris and dust to create a clean surface for your repair material to adhere effectively.
Depending on the size of the crack, you might opt for a specialized epoxy injection or a more straightforward hydraulic cement mix—each with its own advantages. For smaller cracks, epoxy is incredibly reliable, sealing the gap diligently while also providing some flexibility against future shifts in the wall.
Larger cracks may require a more robust approach, including a backer rod for added support. Don’t rush this process; allow the material to set as per the manufacturer’s instructions so that your repair withstands the test of time.
Once filled, smooth the surface for a clean finish, observing where effort meets assurance in your DIY endeavor. Remember, a watertight seal is not just a cosmetic fix; it’s a crucial investment in your home’s longevity.
Conclusion
In conclusion, repairing basement wall cracks is an essential task for homeowners seeking to maintain the integrity of their homes and prevent more significant structural issues down the line. By following this DIY guide, you can confidently address minor cracks and avoid costly basement foundation repairs in the future. Remember to assess the severity of the cracks, utilize the appropriate materials, and take necessary safety precautions throughout the repair process.
With careful planning and execution, you not only enhance the durability of your basement but also contribute to the overall value and safety of your home. Don’t hesitate to tackle this project—your basement will thank you!


